St. Thomas E-Learning And Research - The Intersection of Technology and Pedagogy - Page 9
Student Systems of Support

Student Success Sites: Strategies as You Plan and Develop Your Site

This is the first in a series of blogs tailored to faculty and staff who create electronic learning resources for students. In this article, the concept of  Student Success Sites is introduced, followed by a list of strategies to consider during the planning and development phase. Subsequent blogs on this topic will give more details on these strategies.  

The “What” of Student Success Sites

Student Success Sites are digital learning resources available to students before, during or towards the end of their educational program that contribute to student success. These electronic Student Success Sites can be resources for any students including those in fully online, blended or on-campus programs. These sites may take the form of one learning module (i.e., a chunk of learning on a certain topic) or consist of several modules within a site.

These are several categories of Student Success Sites currently used at the University of St. Thomas:

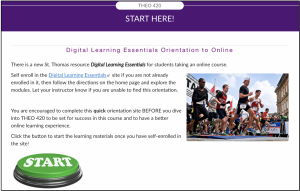
  • Onboarding sites to provide orientation at the beginning of a program or transition “all aboard” to a new experience such as orientation to your first online class;
  • Program community sites to provide connection to the people and information in a program once you have had an initial orientation; and
  • Knowledge, skills or competencies sites to teach a certain concept or subject area that is either program specific or something that cuts across various program areas.

Increasing the Likelihood of Success in Using Success Sites

We want these electronic resources to support student success. Yet, simply calling something a “success tool” or a “student success site” does not automatically lead to success. How can we use data and research, along with hunches and context, to move towards increased student success?

For one thing, as you articulate your Student Success Site goals, also start to envision how you might measure your success at reaching those goals. This up-front planning about how to assess effectiveness of new sites you create will help you to over time make data-based improvements on these resources.

The March 2019 blog post about Strategy One (Articulate the goals for the site and ways to assess its effectiveness at meeting those goals) will further describe this approach.


Another way to use data to inspire your work: Read the Educause ECAR Study of Undergraduate Students and Information Technology, 2018 Report  (Galanek, Gierdowski, & Brooks, 2018).

This study of over 64,00 undergraduate students includes a section of research findings around online student success tools.


The ECAR report describes two types of Student Success Tools:

  • Academic Success Tools that include early alert systems, information on how to improve performance in a course, electronic tutoring tools, and more; and
  • The Work of Being a Student Tools that include things like self service appointment systems and degree planning tools such as tracking credits and courses registration.

The study findings describe how Student Success Tools can contribute to students’ academic success, and identify strategies to improve their use and effectiveness. As I read the phrase “Success Tool” in the report, I think of our Student Success Sites as a particular form of Student Success Tool.

The findings in the ECAR 2018 Study are extremely useful. I wanted to point you to this resource now since I will circle back to ideas from this study in future blog posts.

Devices and Platforms Used for Student Success Sites 

Our Student Success Sites can be accessed electronically from a laptop, desktop, iPad, or mobile device. Some of the content and activities in these sites work best when using a laptop or desktop; however, we strive to create these sites with an assumption that some or much of the content may be accessed from a mobile device.

Variety of mobile devices and tablets

Hands typing onto laptop


At the University of St. Thomas, a growing number of Student Success Sites exist within our Canvas learning management systems (LMS) for the following reasons:

  • Canvas is the platform students use for their for-credit courses, so using Canvas for these sites builds upon the familiarity of a system that students already need to use;
  • Canvas uses a module structure which allows presenting information and activities in a sequential way that scaffolds on previous content; and
  • Because students use Canvas for coursework, there are options to leverage a “flipped” classroom model. For example, some orientation content is presented online prior to students coming to campus for in-person learning interactions, and/or online content is delivered following an on-campus session.

We also recognize that Student Success Sites might be hosted in other online platforms beyond your university’s primary (for-credit courses) LMS and envision over time that some of our St. Thomas Success Sites will also exist in other types of electronic environments or additional technologies that interface with our LMS.

Hand drawing lightbulb


Eight Strategies to Consider as You Develop Your Site


The following eight strategies grow out of reflecting upon various St. Thomas experiences using Canvas as a resource for student success. Consider how these strategies could assist you to plan and develop Student Success Sites.

  1. Articulate the goals and ways to assess the goals of the resource site.
  2. Create a clear home page and simple site navigation so students start and stay with it.
  3. Design resources that are accessible to all students, not just some students.
  4. Offer a variety of ways that students can engage in their learning.
  5. Embed welcome, equity and anti-bias messages into these resources.
  6. Plan an effective introduction of the resource to students so that they know how to find it and why to use it.
  7. Involve the faculty, staff, and student leaders connected to the student experience.
  8. Apply a framework of continuous learning that will help you reach your goals and grow systemic capacity.

Future Student Success Site blogs drill down into these strategies and offer examples of what they look like.

The March 2019 blog will unpack Strategy 1: Articulate the goals for the site and ways to assess its effectiveness at meeting those goals. This first strategy lays a foundational for your Student Success Site and will assist you in leveraging all the other strategies. Bookmark this blog site!

Citation:

Galanek, J.D., Gierdowski, D.C, & Brooks, D.C. ECAR Study of Undergraduate Students and Information Technology, 2018. Research report. Louisville, CO: ECAR, October 2018.

This post was written by Jo Montie, Online Learning Systems Facilitator with the St. Thomas E-Learning and Research (STELAR) Center at the University of St. Thomas in St. Paul, Minn. To learn more about the work of our team and to access additional resources, visit our website at www.stthomas.edu/stelar.  If you have questions about this article or future topic suggestions, please email Jo at jkmontie@stthomas.edu.

Best Practices, Tips, and Tricks

Selecting Images that Comply with Copyright Laws

Have you ever been building a course in Canvas or adding something to your personal website, realized you needed an image, and used an online search to find one? Did you then wonder if that image was copyrighted, but were unsure how to tell? If you answered “yes” to either of these questions, then this post is for you!

The vast majority of the images we find with a simple online search are copyrighted, which means it’s illegal to use them without written permission from the creator. If you use such images without permission, you can receive a cease and desist letter or, worst-case scenario, the university could get sued. Throughout my years of studying and working in the field of online education, I’ve heard the assumption that as long as the images are used for educational purposes, it’s complying with the laws. Unfortunately, this is not what copyright laws state and even in the field of education, we need to be careful about the images we choose to use. Next, I’ll give you a few tips and tricks about where to find images that are legal to use and how to tell if you need to provide attribution.

My favorite image databases are Pixabay and Unsplash. All images on these websites are free, non-copyrighted, and non-attribution, meaning you don’t need to cite your source. You can simply find an image, download it, and use it however you want. Couldn’t be easier!

However, the downside to Pixabay and Unsplash is that they are relatively limited databases and don’t have anywhere near the same number of images to choose from as Google or another large search engine. So if you can’t find an image you like on these two sites, you’ll likely find more options using a Creative Commons search. After clicking on the previous link, uncheck the box for “use for commercial purposes” (since that doesn’t apply to educational institutions), type in your search terms, and click on the “Google Images” box. Any image you find on the search results page is copyright-cleared, although it best practice to follow the link to be sure, and the image will likely require attribution. But be careful, any “related images” Google suggests may not be copyright-cleared, and even those that are will still likely require attribution.

Providing image attribution is similar to citing a source in a research paper; it is a way to communicate to readers the origin of the artifact. What’s more, there is specific information that must be included when providing attribution, the same way that there is for APA or MLA citations. The required information includes (1) the title of the work, (2) the author’s name, (3) a link to the source, and (4) a link to the license. As an example, I used Creative Commons (linked above) to search for images of kittens and I found the following gem:

Three gray kittens with black stripes laying on a blue blanket


Here’s how I would properly provide attribution for this image: “kittens” by Mathias Erhart is licensed under CC BY-SA 2.0

As you can see, the title of the work (“kittens”) is also a link to the webpage where I found the image, which takes care of criteria for both (1) and (3) above. (Quick tip- you can create a hyperlink using CMD+K on a Mac or CTRL+K on a PC.) I also included the author’s name, taking care of requirement (2). You may notice that I made the author’s name into a link to their profile. This is optional, but it’s a nice way to encourage readers to check out more of the author’s work. Finally, I found the type of license and the link on the image’s source webpage by clicking on “Some rights reserved” under the right side of the image, which satisfies requirement (4). Depending on the website where you find your image, you may have to hunt a little harder for this information, the same way that you might have to do for some sources cited in a research paper. Just remember, all four criteria must be included in order to comply with the attribution requirements of copyright laws.

And one final bonus… here are some other databases you might choose to use:

Most, if not all, of the images found in these databases will require attribution. You will need to check each individual image to make sure.

And there you have it! Now you know how to find images that are legal to use in addition to knowing when and how to provide attribution. If you have any questions about this process, feel free to let us know.

This post was written by Karin Brown, an Instructional Designer for the St. Thomas E-Learning and Research (STELAR) Center at the University of St. Thomas in St. Paul, Minn. To learn more about this topic, please visit our website at www.stthomas.edu/stelar or email us at stelar@stthomas.edu.

Best Practices, Tips, and Tricks

Starting a New Semester in Canvas?

So, you’re getting ready for the spring semester and you want to make sure all the plans and content that were there last semester, (or last year!) are showing up in Canvas just the way you’d expect so you’re ready for a new batch of students.

The good news is that you can transfer the content and assignments you had in Canvas a previous term to your spring section of the same course – you just have to take a few important steps first. We call it “Refreshing Your Canvas Course” so it’s ready for the new term and new students. Doing certain tasks ahead of time will ensure you and your new students are off to a good start in the new semester.  You’ll want to take some time over the next few days to review and refresh your course site.

If you’re copying your course from a previous term, most of the content and activities will transfer over just fine, but other apps, like Panopto and Library Resource Lists, may need to be reconnected so they work with a specific course term and section number. STELAR provides the following checklist to help you think through some of the obvious (and not-so-obvious) course refresh tasks.

  1. Import course content from a previous term or from a Canvas template.  Find many STELAR provided templates in the Canvas Commons (Filter on the University of St. Thomas).
  2. Confirm the course start and end dates under “Settings.”
  3. Refresh and update Assignment due dates. For quick due date changes, use the Calendar feature, accessed by clicking Calendar in the purple navigation menu on the left.
  4. Verify Panopto videos are linked and properly closed captioned (if used).
  5. Use the “Validate Links in Content” tool under “Settings” to check all internal and external links since the source of the online content may have changed since last linked.
  6. Verify links to eReserves and Library Resource Lists (if used). Contact your Library liaison to re-associate your Resource List to your new course term.
  7. Copy (without student comments) and re-connect any VoiceThreads (if used).
  8. Un-publish any Modules you don’t want students to see yet.
  9. Refresh Announcements using the “delay posting” feature and adding a future date for when you’d like them to be made visible.
  10. When everything checks out and you’re satisfied with how your site looks and functions, be sure to click on the “Publish” button at the top of the home page.

To learn more about how to do many of these course refresh tasks, check out the Canvas Instructor Guides. There, you’ll find tutorials and step-by-step instructions for every task in Canvas. And don’t forget about the 24/7 Help Line. Canvas Support is ready to help you with any Canvas related issues via phone call, chat, or email.  Simply click the Help button at the bottom of the purple Canvas menu.

Taking a few pro-active steps to refresh your Canvas course site will go a long way in getting you and your students off to a good start in the new semester.

This post was written by Michael Wilder, an Instructional Designer for the St. Thomas E-Learning and Research (STELAR) Center at the University of St. Thomas in St. Paul, Minn. To learn more about this topic, please visit our website at www.stthomas.edu/stelar or email us at stelar@stthomas.edu.

Technology Tools

OEC Studio Updates Benefit Content Creators and St. Thomas Community

The HD Multimedia Studio located in OEC LL2 has recently been upgraded to include several new functions that are useful not only for original educational material/content creators but also for the broader St. Thomas community to produce content in a highly controlled professional media production environment.

In addition to the multi-camera HD production capabilities, recent updates to the OEC multimedia production studio include:

  • The most fully integrated high-end media production SMART board on campus
    • 75″ screen
    • Display content and allow for content markup
    • Multi-color markup and highlighting
    • Individual screen capture or integrated into multi-camera production switched content
    • Recorded or live to web broadcast functionality
  • Live “Zoom” meetings integrated into the high-end media production facility
    • Take advantage of a highly-controlled production facility with staff support
    • Hold live web meetings with multiple remote participants
    • Record remote presenters
    • Useful for experts or presenters that are not always able to be in-person on location
  • “Panopto” multi-session recording capabilities
    • Individually capture SMARTboard as one source and professional cameras as another source
    • Fully utilize Panopto’s capabilities in your course using the studio’s high-end production cameras and gear

You can even view a 360-degree tour of the OEC studio!

These additional features add a whole new dimension to your content creation possibilities!  Stop by any time to the OEC Multimedia Studio located at OEC LL2 or email us at itsstudio@stthomas.edu to reserve a time to get a demonstration of the facility or to schedule a time to meet with studio staff to discuss your next project.

We look forward to working with you!

This post was written by Dan Lamatsch, a Media Services Senior Engineer for the St. Thomas E-Learning and Research (STELAR) Center at the University of St. Thomas in St. Paul, Minn.  To learn more about this topic, please visit our website at www.stthomas.edu/stelar or email us at stelar@stthomas.edu.

Student Systems of Support

Digital Learning Essentials Site: A Resource for Students and Faculty

This article describes the Digital Learning Essentials online student resource and how faculty can use this site to support student success.

What is the Digital Learning Essentials Site?

Digital Learning Essentials is an online resource for St. Thomas undergraduate students to prepare for online courses and any Canvas courses. Although the site targets student needs, we think students are more likely to explore the site when faculty point out the resource, so we are increasing our efforts to get the word out to faculty.

This Canvas site grew out of a process of listening to student and faculty feedback during the 2017-18 school year where we learned that some of our undergraduates—especially those taking online or blended courses, found it beneficial to have access to technology and Canvas resources before or at the start of an online class.

Three self-paced modules guide students through content and activities on these topics:

  • Your Tech Prep helps students to check their computer set-up and technology resources.
  • Explore Canvas helps students to learn about the St. Thomas online learning platform.
  • Learning Success highlights learning resources on topics such as time management.

Once enrolled into the site, students can access the site for their entire program: this is a 24/7/365 resource! Students also have the option to earn a Digital Learning Essential Certificate of Completion to further demonstrate some base technology and digital learning knowledge and skills.

Who Can Access the Site?

First-year undergraduates (starting fall 2018) are automatically enrolled into this site to have access to this resource when they need it; other students who are not first-years can be given these self-enrollment directions by their instructor:

To self-enroll into the Digital Learning Essentials site, copy/paste this URL into a new browser window https://stthomas.instructure.com/enroll/GPWRWH, then accept the course invitation.

Faculty use this same link to self-enroll and explore firsthand what is in the site to determine if or how you’d like to have their students use the site. Site moderators monitor the discussion board, update course content, review requests for the certificate, and respond to occasional student questions. Non-St. Thomas users can contact Jo Montie to request access to a visitor version of the site.

How Can Faculty Use the Site to Assist Students with Online Readiness?

Review this list to consider ways that Digital Learning Essentials may be a resource to you and your students:

  • Provide the Digital Learning Essentials self-enroll link in your professor announcement the week before class starts.
  • Include directions for participating in the Digital Learning Essentials Site in a Get Started module. Here is an example of how Professor Paul Wojda (Department of Theology) introduced students to this resource in a Start Here module page.

  • Suggest reviewing a portion of the site before an upcoming class activity. For example, ask students to complete the “Using VoiceThread” or the “Taking Proctored Exam” page. Or perhaps design a “Go Find These Five Things” activity or quiz to tailor the activity to your course content.
  • Require students to complete activities in the site to earn the Certificate of Completion and then share a copy of the certificate with you. See the home page of the site for the requirements to receive the Certificate. Here is an example of a direction page for your Get Started module:

  • Offer a review activity after students complete the resource site. Professor Alison Underthun-Meilahn (Department of English) includes these directions for a 5 point reflection assignment after students complete Digital Learning Essentials:

We hope that these ideas inspire your creative thinking on how to support your learners in pre-course preparation for online and blended courses. To share your examples or for help finding ways to leverage the Digital Learning Essentials site, reach out to Jo Montie or any STELAR instructional design partner.

This post was written by Jo Montie, Online Learning Systems Facilitator with the St. Thomas E-Learning and Research (STELAR) Center at the University of St. Thomas in St. Paul, Minn. To learn more about this topic, please visit our website at www.stthomas.edu/stelar or email Jo at stelar@stthomas.edu.