Best Practices, Tips, and Tricks – St. Thomas E-Learning And Research - Page 2
Browsing Category

Best Practices, Tips, and Tricks

Best Practices, Tips, and Tricks, Technology Tools, Uncategorized

Zoom and Flex Classroom Self-paced Canvas Site for Faculty

St. Thomas faculty are invited to self-enroll into an online resource that supports their development of Zoom and Flex Classroom Support knowledge, skills, and practices. Zoom is the main video conferencing platforms used at St. Thomas, and flex classroom refers to blended, hyflex, co-flex, hybrid course delivery…basically anyone teaching a class except fully online or fully face to face may find this module helpful.

Please use this enroll link to join this Canvas site: https://stthomas.instructure.com/enroll/RP74HJ

This Canvas site helps faculty to find additional support and practice with Zoom (including both basic and advanced Zoom use), access videos and tutorials on using equipment and safety protocols for flex classrooms, and share tips and support with faculty and Innovation and Technology Services(ITS) team colleagues.  Zoom Service Team and Classroom Tech team colleagues monitor the discussion.

This resource complements other resources published in our ITS/STELAR pages by putting that content into a Canvas learning structure into four learning modules/topics.

These are the modules to explore in any order:

  • Zoom Host module: Access content and activities to develop knowledge and practices to be an effective Zoom host (both for beginners and more experienced Zoom users);
  • Zoom Challenges and Solutions module: view some entertaining yet “this could be true” Zoom scenarios, and expand your solution-finding Zoom muscles!
  • Zoom Assistant module: build your Zoom skills to assist, co-host, and support others in using Zoom;
  • Flex Classroom Foundations module: how to use technology equipment and health/safety protocols in flex classrooms.

Enroll in the Zoom and Flex Classroom Canvas site at  https://stthomas.instructure.com/enroll/RP74HJ

  • Use your UST username and password to enroll.
  • Feel free to also share this link with other instructors who may find it useful.

Additional resources for St. Thomas faculty, include: STELAR Training and Events page includes the following: Faculty Development webinars, Faculty Checklist, STELAR Techfolio, and booking a one-on-one appointment. We also point you to the  Fall 2020 Course Design and Support Resources

Shout out to the St. Thomas E-Learning and Research Team (STELAR) and classroom and Zoom ITS colleagues for this awesome resource!

There is a badging option to earn a Zoom Host and Zoom Assistant badge in this site, and an additional badging/training site for student employees and staff who are pursuing the expansion of their Zoom and Flex Classroom skills to then assist others. Contact Sam Baldwin (ITS) for additional information on the student employee Zoom and Flex Classroom badging site, and Jo Montie jkmontie@stthomas.edu for additional information on the faculty/instructor site.

This post was written by Jo Montie, Online Learning Student Success Facilitator (jkmontie@stthomas.edu) with the St. Thomas E-Learning and Research (STELAR) Center at the University of St. Thomas in St. Paul, Minn. To learn more about this topic, please visit our website at www.stthomas.edu/stelar or email us at stelar@stthomas.edu


Best Practices, Tips, and Tricks

A Taxonomy of Online Discussions

Discussions have always been a vital part of education. When education shifts to online delivery (at least partly), especially during times of necessity like the 2020 coronavirus pandemic, many instructors seek ways to translate the discussion strategies and approaches that have worked well in the traditional, physical classroom environment to the online environment and to take advantage of strategies and approaches unique to it.

In this post, we will help facilitate that by (1) outlining the most common types of discussion found in both online and physical classrooms. We will then (2) describe several ways in which discussions might be structured. Finally, we will (3) present a variety of ways instructors might approach an online discussion that can utilize these structures and fulfill the aims of one or more of the various types.

Many of these strategies have been discussed in more detail in other STELAR Blog posts about writing effective discussion prompts:

Review Planning and Facilitating Online Discussion Boards and visit the STELAR training courses for more important general guidelines, strategies, and advice. This is especially important for adapting these approaches to your own course with its unique aims and objectives. Faculty can find STELAR training courses on their Canvas dashboard.


Types

Broadly speaking, whether inside of the physical classroom or online, discussions will frequently fall into one or more of the following types:

  1. General reflection
  2. Reading/media/lecture responses
  3. Application
  4. Debate
  5. Collaboration

The type of discussion corresponds closely to its objectives, and that, in turn, relates to the objectives of the course itself. So when we’re planning an online class, especially one that takes its bearings from a traditional physical course with an important discussion component, we want to consider what type(s) of discussion we’re seeking to facilitate in order to fulfill the objectives of the course.

When we discuss various approaches below, we will indicate the type(s) of discussion each approach can facilitate.

Most approaches can be structured in a variety of ways, some of which are more effective than others depending on the course, students, and content, so let’s first consider some of those structures before moving on to the approaches.


Structures

By “structures” we are referring to such factors as how the classmates interact with each other, the instructor, the course content, etc.; how the prompt is presented; how the response(s) are presented; and so on.

Standard

The standard and most common structure involves the instructor posting a prompt to which each student must respond. Typically students and the instructor will then comment on what other students have said in response to the prompt, and ideally that will instigate further dialogue.

This works quite well for many discussions, but often discussions can benefit from taking a different approach, whether because the different approach can better fulfill the goals of the discussion or just to mix things up a bit and make it more interesting and fresh for the students (and the instructor!). Just as in the traditional physical classroom, a different structure can “spice things up”. Here are a few such alternatives.

Fishbowl

Students are divided into active participants and observers. (The name “fishbowl” comes from the physical classroom setting in which the active participants are often in the middle – the “bowl” – while the observers are “outside the bowl”.) By reducing the number of discussion participants, it can encourage more reticent students to participate, provide more impetus for participating students to prepare, keep the discussion focused, and so on.  And those who are in the observer role can process the discussion without the pressure (or in some cases, the opportunity) to contribute, which can also be pedagogically fruitful.

Variations:

  • Part of the class discusses for 10 minutes while the others observe, then they switch.
  • Part of the class engages in discussion while the other half writes a reflection paper on the discussion.
  • At the beginning of the semester, students sign up for an equal number of sessions as active participants and as observers.
  • Each week includes two discussions, and each student is a participant in one and observer in the other.

Sequential prompts

Begin with simple or specific prompt, give them time to respond, then follow up with another prompt eliciting further complexity, depth, critical analysis, etc. For instance, instead of posting the entirety of a 2-part or 3-part at the beginning of the module, the instructor may post Part 1 on Day 1, Part 2 on Day 3, etc. Or post different parts in subsequent weeks. This can help students focus on earlier parts before moving on to the later parts, and it also can be an effective stimulus to critical thinking when the subsequent parts have them expand, reconsider, apply, or defend their response to the earlier parts.

Examples:

  • Present the first part of a thought experiment and have them respond to some questions. Then, present a “twist” to it that upends assumptions, forces them to confront a possible conflict with their original response, etc.
  • Present a case study sequentially, only revealing a bit at a time. (This can impress upon them the importance of considering all the relevant information before forming judgments.)
  • Present a prompt having them reflect on an important concept before engaging the week’s content. Then follow up with a prompt having them consider the impact the content had on their original reflections.
  • Ask for an example pertinent to the week’s topic, then in a follow up have them turn back to something earlier in the course and consider how that example relates.

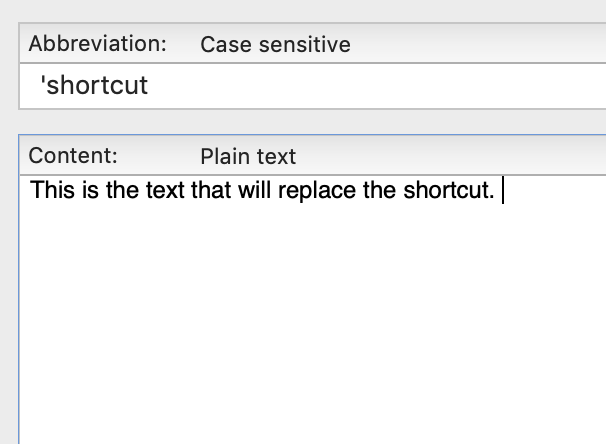
Student creates question

Designate a student or group to provide the prompt for the rest of the class. This can work especially well with approaches 1-3 below.

1 comment 1 question

Students are required to make 1 comment and raise 1 question in response to a prompt, another student’s post, etc.

Often providing a simple structure such as this can help focus student responses in a way that encourages them to engage multiple modes of thinking (it may be more difficult for a student to think of a question than to think of a comment, for instance). This approach can also rein in on some students’ tendency to be too verbose and/or unfocused and require them to sort through their ideas in order to select which one to post. Finally, when used as a requirement for responding to peers, it can facilitate interesting dialogue as the original poster has a multifarious response to consider.

Debate

Students are presented with a problem or claim or some other stimulus and debate about the best interpretation, response, answer, etc. This could be done in a “fishbowl” style with individuals or small groups debating while the others observe, or it could be done in larger groups.

Variations:

  • Formal written debate: students/groups could be asked to provide, e.g., an “opening statement” on Day 2, a “response” to the other’s opening statement in Day 4, and a final “reply” on Day 6.
  • Informal debate (such as those one may find on social media platforms):  increase discussion requirements such as how frequently they are required to post, how many separate days, how many replies to peers, etc., while providing a similar overall word count requirement to other discussions.
    • Generally, the best informal debates will involve frequent back-and-forth and will avoid excessively long and detailed posts, so having a high number of posts/days/replies could be advisable.
  • Use this as a way to break up a Zoom class. Spend 20 minutes in a “Formal” debate between two individuals/groups, and the next 20 minutes opening it up to the rest of the class, followed by 20 minutes of instructor commentary.
  • Collaborate on a VoiceThread involving Side A’s opening remarks on a slide, Side B’s opening remarks on the next slide, etc., and the rest of the class can comment on each part.
  • Combine with the “Roleplaying” by assigning students a side to defend rather than allowing them to choose their own.


Approaches

In this section we describe several different approaches instructors may take to the discussion, each of which could utilize any of the structures described above. For each approach, we have indicated which of the four discussion types the approach is particularly well-suited for, though there is no reason, of course, why they could not be adapted to other types. And we have included a list of variations, to which countless more could be added (and we heartily welcome any additions you might contribute).

A few things to bear in mind as you’re considering these:

  • Discussions may contain several parts (or be parts of a sequence), each of which incorporates a different approach (e.g., Part 1 is a Comparison, Part 2 is a Case Study exploring the practical implications of the differences; or Part 1 asks for examples, and Part 2 is a Proposal/Plan).
  • If you are teaching a course that includes asynchronous and synchronous components (e.g., students participate in an asynchronous, written discussion board before meeting together synchronously in a physical classroom and/or on Zoom), you could use one approach for the asynchronous part and another approach for the synchronous part.

Reflection Question

Basic Approach:

Possibly the most common type of discussion, this approach asks students to share their thoughts and reflections on a topic.

Discussion Types:

Naturally this is the paradigm of a Type 1 discussion, but it is also a frequent way to approach a Type 2, 3, or 4 discussion.

Variations:

  • Should…?
  • What is your reaction to…?
  • What are your thoughts on…?
  • How should…?
  • Is X too…?
  • What does X mean…?
  • What are the 3 most important…?
  • What is the best way to…?
  • How is X understood by…?
  • Could you…?
  • How much do you know about…?
  • Have you ever…?

Analysis/Interpretation

Basic Approach:

Students are asked to provide an analysis, interpretation, reaction, or some other response to the content. The quality of the discussion often depends partly on how well-crafted the prompt is. Vague or highly open-ended prompts may elicit good discussions, but just as often they may elicit long, rambling responses from some, vague and vacuous responses from others, and a lack of cohesion or focus overall. On the other hand, prompts that are too narrow or which have right/wrong answers may fail to generate depth, meaningful dialogue, or critical reflection.

On the other hand, instructors may intentionally craft a prompt that has these “problems” as part of a sequence or when intending to be heavily involved in facilitating the discussion.

Discussion Types:

This is primarily a Type 2 sort of discussion, but it could also be the stimulus for or a preliminary to Types 1, 3, and 4.

Variations:

  • Many of the approaches described below could be considered variations of the basic analysis/interpretation approach.

Quote / Passage / Concept

Basic Approach:

The discussion or discussion threads center around a particular passage, quote, or concept encountered in the course material. It may ask for an interpretation, explanation, analysis, reaction, etc.

Discussion Types:

This is primarily a Type 2 sort of discussion.

Variations:

  • “Explain to a child”: Provide the passage (e.g., a complex or challenging one), students are asked to summarize and explain it in terms that are simpler and clearer. Other students provide feedback. A downside is that students might rely too much on how their peers have responded. Here are some ways around that:
    • Set up the discussion so that students must first post before they can see what other students have posted.
    • Provide a series of quotes, students choose them on a first-come, first-served basis.
  • Each student identifies a quote/passage and explains why it stood out, etc.
  • Save the last word“: Designated student(s) identify a quote and post it as the discussion prompt (or the start of a thread within the discussion) without comment. Other students comment for a few days, not knowing why the student chose that quote. After a period of time, the original student responds. See Karin Brown’s post for more details.

Question / Confusion / Muddiest Point

Basic Approach:

Have students identify something in the course content (readings, lectures, etc.) they are having particular trouble with.

Discussion Types:

This type of discussion is a response to course content, so is particularly well-suited to discussion Type 2.

Variations:

  • Each student raises a question or confusion and responds to ones that classmates have raised.  Students should be prompted to explain the question or confusion.  May add a “first come, first served” element so students are encouraged to get into the discussion early.
  • Divide up the class into small groups (e.g., 5 students), have 1 present question, the others respond. Can lead to interesting nuances, reveal disagreements and deeper confusions, etc.

Objection

Basic Approach:

Students review the course content under discussion and raise a possible objection to some part of it. Alternatively, the instructor provides a specific argument, claim, position, etc.

Discussion Types:

Primarily either Type 1 or Type 2, it can be a good way to facilitate reflection, understanding, and critical thinking by being able to formulate an objection to an argument or analysis (especially when one agrees with it). It can also be a form of Type 3, especially since many objections will emerge as an argument or concept is applied to new cases.  It could additionally be the basis of a debate (Type 4).

Variations:

  • Have each student raise a possible objection and respond to that objection from the point of view of the argument, then assess the strength of the response.
  • Divide the class into “Pro/Con”. Have half the class (individually or as groups) raise an objection and the other half respond.
    • This can be a good prelude to a synchronous discussion (physical or online) in which the class assesses the debate.

Comparison

Basic Approach:

Students are asked to compare/contrast/relate different things. These could be readings, media, images, concepts, arguments, events, outcomes, plans, etc.

Discussion Types:

This could be used in any type of discussion.

Variations:

  • Students identify 3 points made by author A that author B would contend with.
  • Relate a piece of fiction with a non-fiction piece.
  • Pair this with a “Roleplaying” or “Ask for Examples” discussion.
  • Analyze the strengths/weaknesses of rival methodologies in terms their applications.
  • Compare points of view within a text.
  • Compare the approach to an issue or problem of one discipline with that of another.
  • Students work on some project independent and compare their results as a form of collaboration.

Roleplaying

Basic Approach:

Students are asked to assume a certain role and respond to the prompt from that perspective.

Discussion Types:

This works especially well as a Type 2 (Application) discussion when the role in question is that of someone having to perform a certain task.  It can also be a Type 1 discussion if adopting the role in question requires a grasp of the relevant concepts, facts, history, and so on. And it can be an excellent way to approach a debate (Type 4). As Karin Brown states, “this method works well if you want students to discuss a thorny issue that has many different viewpoints and stakeholders.”

Variations:

  • Students are given the role of a professional (manager, caregiver, scientist, engineer, programmer, etc.), given a certain problem or case, and prompted to respond to it.
  • Students are given a text (or other source) with characters (real or fictional) and they have to adopt the perspective of one of the characters in response to a prompt (such as a scenario, a conceptual dispute, another text, etc.).
  • Can be used in conjunction with a debate-style discussion by having students take on the role of opposing sides in a debate.
  • To facilitate understanding, broad-mindedness, empathy, critical reflection, and other such virtues it could be instructive to have students adopt a role quite different from their own.

Case studies

Basic Approach:

Students are presented with a particular situation or problem and they must discuss how to respond to it.

Discussion Types:

This is a paradigmatic Type 3 (Application) discussion. However, these are often used dialectically in conjunction with a reading or lecture as a way to deepen an analysis, assess understanding, and so on. It can also serve as the catalyst for a debate by having students defend rival interpretations or responses, as well as a stimulus for general reflection.

Variations:

  • Students are divided into groups and given different cases to analyze, then present a summary to the rest of the class.
  • Have students briefly explain and then apply a methodology to the case.
  • If there are alternative or rival methodologies and approaches, divide the class into groups, each of which takes a different one in response to the same case. This can be the foundation for a later synchronous discussion or a later part of a “sequential prompts” structure.
  • Have students analyze the conceptual issues questions that a particular case elicits without expecting them to resolve it. This can be part of a “sequential prompts” structure if they are later asked to discuss possible resolutions.

Thought Experiment

Basic Approach:

Students are presented with a scenario, but unlike a straightforward case study, the scenarios in thought experiments are deliberately designed to focus attention on some particular concept or problem.

Discussion Types:

Given that thought experiments are generally more artificial and contrived than a case study, they will often be more of a Type 1 or Type 2 discussion than Type 3 .  But like Case Studies, they can be the catalyst for a debate as well.

Variations:

  • Present multiple versions of a thought experiment with slight but significant variations.
    • Have different groups analyze each one and discuss the similarities and differences that emerge.
    • Use the “sequential prompts” approach (above) to introduce the variations.

Ask for examples

Basic Approach:

Students are given a concept, problem, idea, theory, or other stimulus and asked to provide their own example of that.

Discussion Types:

Asking for examples is a very common and effective way of engaging students in general reflection (Type 1). The challenge of thinking up an example that represents a particular idea is a powerful way to gain or assess understanding of that idea and as part of the process of critical analysis, fitting with Type 2 . It is likewise a form of application given its practical, concrete character, serving as a Type 3  application discussion.
Moreover, it involves a significant amount of creative and original thinking that could lend itself to a Type 5  Collaboration-style discussion as a stage toward the completion of a project or assignment.

Variations:

  • Examples from personal life
  • Examples from popular culture (literature, film, TV, etc.)
  • Examples from history, current events, etc.
  • Examples from professional experience
  • Examples students imagine or create

Proposal/plan

Basic Approach:

Students are given a scenario, case, problem, set of parameters or conditions, etc., and asked to draw up a plan or proposal for addressing it, or present an abstract, outline, bibliography, or something similar that will be the basis for an essay.

Discussion Types:

This is best as a Type 3 and/or Type 5 discussion. Working individually or in groups, students can apply the concepts and procedures they have learned in direct, concrete way. When the proposal or plan serves as a starting point for a project or assignment, students can use the discussion boards collaboratively to provide feedback on each other’s work.

Variations:

  • Research proposal
  • Business model
  • Treatment plan
  • Essay abstract/outline/bibliography
  • Presentation outline
  • The Charrette protocol

This is a work in progress that benefits from contributions from others. Please feel free to share comments and suggestions.

This post was written by Brad Thames, Instructional Designer with the St. Thomas E-Learning and Research (STELAR) Center at the University of St. Thomas in St. Paul, Minn. To learn more about this topic, please visit our website at www.stthomas.edu/stelar or email us at stelar@stthomas.edu

Best Practices, Tips, and Tricks

Text-Expansion Software

Want to cut down on repetitive tasks while teaching online? Need a way to organize and retrieve bits of text?  Try text-expansion software!

What is Text-Expansion Software?

Text-expansion software (also sometimes called a “typing accelerator”) allows you to create a “snippet”, which can be anything from a single word or symbol to whole passages of text along with an associated abbreviation that, when typed, gets replaced by the text.  As I explain more below, if you find yourself typing things out on a regular basis, text-expansion software can greatly cut down on the time it takes to do so.

In addition, it can also be used as a helpful way to store and organize text, such as quotations and passages you want to save, posts or messages that you’ve written and want to reuse, bibliographical citations, etc.; and it can serve as an “autocorrect” feature of the sort you may be used to in programs like Microsoft Word.

In this post, I will explain how features like this have made text-expansion software one the most indispensable tools in my daily life and work, especially teaching online.

The software I use, and which I will showcase in this post, is called aText.  It’s been available for Mac users for years, and as of this 2020 it’s now available for Windows as well.  The Mac version costs only $4.99. The Windows version is $5/year for a subscription or $25 lifetime.

Another alternative for both Mac and PC is TextExpander.  It’s a bit pricier – $3.33-$4.16 per month, depending on the billing plan – but it is a bit more robust and works on more devices (such as phones and tablets).

There are some other programs, but I can’t speak to any of their features or quality.

How It Works

The primary function of the software is text expansion, but I also find it quite useful for organization as well. I will briefly explain how each of these works before saying more about how I implement these functions when teaching.

Text Expansion

“Text expansion” involves typing a string of characters (a shortcut, or what aText calls the “Abbreviation”), and the program replaces that with other text (called the “Content”).

Screenshot of a Snippet


Expansion with Trigger Character

In most cases you would begin the shortcut with a “trigger” character, which in my case is an apostrophe (‘).  For instance, if I want to quickly insert my email signature, I can type ‘sig, and the program will replace that with my full signature. (Using just sig as the shortcut for the full signature would mean that every time I typed sig it would replace it with my email signature, which would make typing a word like “signature” impossible – once I type the first three letters, the whole signature would appear before I can type the rest of the word; that’s why I use the ‘ as the first character of the shortcut.) But the trigger character can be anything you want. The key is to cut down on typing; I find the apostrophe the most accessible trigger, but others may prefer a different one.

Expansion Without Trigger Character

In other cases it may not be necessary to use the trigger, such as when you want the program to always change a certain string of characters.  For instance, I have things set up so that b/c automatically changes to because, w/ to with, lmk to let me know, thru to through, and so on.

In this short video, I write an email letting my students know about upcoming office hours (an email I might frequently send and thus have a shortcut assigned to it), and demonstrate the use of text expansion with and without a trigger character.

Organization

The program also provides a handy way to organize blocks of text that you may want to be able to find and retrieve. As we will see below, this is quite useful when it comes to organizing discussion posts, assignment comments, emails, and other ways of engaging with students. You may also, for instance, find yourself writing similar emails on multiple occasions, but not so much that you create a shortcut for it.

In such cases you can use the shortcut or “Abbreviation” space to instead write a tag that allows you to quickly locate the text you want, which you can then copy and paste. I use capital letters for that tag since I will probably never write those words in caps otherwise. Or, you may precede the tag with a character like !.

In this screenshot, you can see that some emails have a tag, because I write them more frequently, while others don’t either because I don’t write them as frequently or because I may have multiple versions stored in the Content window.

Screenshot of Abbreviations

Use in Grading

One frequent use is in written assignment grading for online classes or any class in which papers are graded with a computer rather than by hand.

Let’s begin by noting a potential advantage that computer-based grading can have over hand-grading: instructors can provide comments that (a) don’t fill up the page with ink and (b) are reusable, and so don’t require rewriting the same or similar comments over and over.  This is especially handy when it comes to making more detailed and substantive comments, and so computer-based grading offers the opportunity to greatly expand and enhance the feedback we provide to students while cutting down on time.

Text expansion software brings out this potential wonderfully.

I have a large database of generic writing comments that I use frequently, regardless of the course or assignment, and that can be triggered with a few keystrokes.  In the following examples, the shortcut – what I actually type – is the string of characters before the –>, and it gets automatically replaced with the text after the –>:


  • ‘inc –> This is an incomplete sentence.
  • ‘removeap –> Remove the apostrophe. This is a plural noun, not a possessive one.
  • ‘reword –> Can you reword this sentence to enhance its clarity and ensure that it’s grammatically correct?
  • ‘informal –> This language is a bit too informal or conversational in style. Academic writing is structured and formal. What may seem appropriate in everyday conversation is not necessarily appropriate for an academic essay.
  • ‘citepage –> You need to be sure to include the page, paragraph, or section number when quoting a text – something that allows the reader to identify as closely as possible where in the text the quote comes from.
  • ‘quoteexplain –> While it is good practice to support your arguments with relevant quotations, it is important to explain what you take the author to mean and how it relates to what you are saying in the paragraph, i.e., whether it provides a challenge or support for your own argument, and how it does so.  I should never be left wondering why you included a quote, or what role the quotation plays in the context of your own discussion.
  • ‘informal –> This language is a bit too informal or conversational in style. Academic writing is structured and formal. What may seem appropriate in everyday conversation is not necessarily appropriate for an academic essay.
  • ‘whom –> This should be “whom”. Remember to use “who” when referring to the subject of a clause, and “whom” when referring to the object of a clause.  For example, “this is the person who came to my house yesterday” vs. “this is the person to whom I gave the key to my house yesterday.”  In the first sentence, “who” refers to the person that did the action (the subject); in the second sentence, “whom” refers to the person that the action was done to (the object).
    Or: “who married Bill last year?” vs. “whom did Bill marry last year?”
    An easy way to remember this is to think about when you would use “he/she” vs. “her/him”.  “Who” is used in the same way that “he/she” is used, and “whom” is used in the same way that “her/him” is used.  For example, would you say “who wrote the letter?” or “whom wrote the letter?”  If you substituted “he/she” and “her/him”, you would find that “he/she wrote the letter” is correct, therefore “who wrote the letter?” is also correct.
    Or would you say “who did he write the letter to?” or “whom did he write the letter to?”  Substituting the other words, we have either “he wrote the letter to she” vs. “he wrote the letter to her.”  The second is correct, and so “whom did he write the letter to?” is also correct.
  • ‘notscholarly –> You need to be referring primarily to scholarly sources in your assignments.  Scholarly sources are ones in which the published material has been peer-reviewed by other experts in the field to make sure that the content is reliable and worthy of publication, and contains references and a bibliography to support the author’s claims.  If you need assistance understanding whether a source is scholarly or not, go to the St. Thomas Library website, click on “Research and Course Guides”, and “General Research Tutorial” on the right side under “How to do Research”. Then, hover over the “Selecting Your Sources” tab and click “Finding Articles”, which gives you detailed information and examples of scholarly and non-scholarly sources.


You can see how using text-expansion software provides that extra clarity and instruction to one’s comments that can substantially enhance the students’ learning but which would be quite burdensome if the instructor had to write it out each time, particularly when it comes to the much longer comments like the last few; instead, the instructor merely has to type in a few keystrokes.

See this in action here:


I also keep a large database of substantive comments on more particular topics; in fact, it’s generally the case that when I spend time writing out something substantive, I save it in my snippets. Since I don’t use these as often, I don’t assign a shortcut. Instead, I give it a label in all caps that helps me quickly identify it in the list of snippets, and I can then copy and paste it (or one of multiple variations I might have stored) into the comments.

Screenshot of Text Organization

Use in Discussion

As before, let’s first briefly acknowledge that online discussions provide unique opportunities, such as involving more students in discussions and encouraging contributions that feature greater depth and care.  Of course, there are many drawbacks, some of which are directly related to those advantages – composing discussion responses can take significantly more time than making oral comments within a face-to-face discussion, and when you often have to address many students rather than addressing the whole class at once, that compounds the time burden on instructors.

One way to cut down on that burden for instructors who teach similar courses over time is to be able to save and reuse discussion posts. Text-expansion software provides a helpful way to store such comments and quickly retrieve them when the occasion arises.

Screenshot of Stored Text

Autocorrect

Many people are familiar with the autocorrect feature from using programs like Microsoft Word that automatically changes commonly misspelled or miscapitalized words as you type (like teh to the or i to I). Many people also know that you can customize that feature, such as by adding to the list of autocorrects.  Text expansion software allows you to do that same thing on any computer program, not just Microsoft Office products, most notably when typing in a web browser.

This is useful not just for correcting mistakes.  I frequently add words and phrases that are a bit of an annoyance to continually type out, either because of their length or their complexity.

I noted a few above, like changing b/c to because, lmk to let me know, and things like that. Over the years as I have written and taught philosophy, I have had to continually write out terms like “being-in-the-world“, “phenomenological” or “Categorical Imperative“, which I triggered with the shortcuts ‘bitw, ‘phenll, and ‘ci.  I’ve also used it to trigger Greek text by typing the English transliteration, such as triggering ευδαιμονία from ‘eudaimonia.

Every discipline similarly has technical or cumbersome words or symbols, or ones that require hunting, pecking, inserting, etc. These programs can save time and help you stay focused on what you’re writing rather than the task of typing, and they will work the same in any program you may be using.

Potential Problems

One possible drawback to the use of this software, especially in teaching, is that it may seem to encourage a form of engagement that is more mechanical and perfunctory, presenting only the façade of the kind of direct, personalized engagement they deserve. This is a legitimate concern, but not a necessary one.

Pre-written comments can – and usually should – be read through, adapted and customized to the particular context before being posted.  This makes their use not dissimilar to the way one might have a more-or-less memorized response to a common question asked in a face-to-face environment, but still express it in a way that is personalized to the particular situation.

We should remember that while the online environment provides great opportunities to engage with students in uniquely fruitful ways in comparison to traditional, face-to-face environments, such as by allowing our responses to students be more thought out, carefully expressed, and substantive, this comes at the cost of adding substantially to the amount of time the instructor puts into this engagement.  Text-expansion software helps to cut down on those costs while still allowing for the advantages to shine through.

As a final note, every time I used the term “text-expansion software” while writing this post, I was typing the abbreviation ‘te contained in a “Temp” folder within aText.  Another example of how widely useful a program like this can be!

Canvas: Did you know...?, Technology Tools

New Rich Content Editor in Canvas

You might not know what it’s called, but you have used the Rich Content Editor multiple times. It’s the ribbon of tools at the top of the frame when you edit pages, discussions, assignments, etc. in Canvas.

St. Thomas is enabling the new Rich Content Editor on January 5th, 2021. However, faculty can switch over to the new editor at any point. Keep in mind that when you switch to the new editor, all users in that class (including students) will be switched over, too. Read more below to learn about the new features and how to try it out.

The original Rich Content Editor featured two rows of editing tools and a sidebar for accessing Links, Files, and Images.

Original Rich Content Editor

The new Rich Content Editor is much more compact and eliminates the right side-bar menu:

New Rich Content Editor

Advantages of the New Rich Content Editor:

  • one hour of auto save (no more losing your work when your browser crashes or you accidentally click Cancel instead of Save)
  • more space on the screen for your work
  • less scrolling when you building quizzes and syllabi

Where did Everything Go?

All the items currently in the menus at the right side of your screen have been split into different icons in the new Rich Content Editor:

  • Course Links (A)
  • Course Images (B)
  • Course Media (C)
  • Course Files (D)

External tools (including Panopto, YouTube, and library materials) are now in the “plug” icon. (E)

The Accessibility Checker (F) and HTML/Text Editor toggle (G) are on the bottom right.

Note: You can also use the menu (H) to do your editing. Click each of the menus to find some additional functionality, such as: undo/redo, inserting a horizontal line as a visual break, additional options for formatting text, and more.

see Canvas tutorials for accessible images of new rich content editor


Can’t find what you’re looking for? Canvas has updated tutorials for faculty and students. Plus, Canvas Support is available 24/7 to help you.

How to Get the New Rich Content Editor

The new Rich Content Editor is available now, but it’s optional. The New Rich Content Editor will be enabled for all users on January 5th, 2021.

Want a sneak peek or to take advantage of the auto-save feature? Enable the New Rich Content Editor in your course(s) by Going into Settings > Feature Options and turning on RCE Enhancements.

This post was written by Nancy McGinley Myers, Instructional Designer with the St. Thomas E-Learning and Research (STELAR) Center at the University of St. Thomas in St. Paul, Minn. To learn more about what STELAR can do for you, please visit STELAR’s website or email us at stelar@stthomas.edu.

Canvas: Did you know...?, Technology Tools

Update to Canvas Quizzes

Since 2017, Canvas has offered two options for online quizzes:

  • Quizzes LTI (“New Quizzes”)
  • Legacy Quizzes (“Classic Quizzes”)

Prior to February 15, 2020, Classic Quizzes could be found by clicking on “Quizzes” in the course navigation menu and New Quizzes could be found by clicking on “Assignments.” However, starting on February 15, 2020, both types of quizzes will be found by clicking “Quizzes.” Faculty will no longer be able to create a quiz by clicking on “Assignments.” Canvas will eventually migrate all quizzes currently in the “Assignments” area to the “Quizzes” area, but there is no timeline for that migration.

Starting February 15, 2020, to create a quiz in Canvas, click on “Quizzes” in the course navigation menu, and then click the purple +Quiz button. You will then see this dialog box, where you will choose which type of quiz you want:

Text on the screenshot: Canvas now has two quiz engines. Please choose which you'd like to use. Classic Quizzes: For the time being, if you need security from 3rd-party tools, Speedgrader, or CSVs for student response analysis, this is the better choice. New Quizzes: This has more question types like hotspot, categorization, matching, and ordering. It also has more moderation and accommodation features.


If you use essay or short response questions in your quizzes, use the Classic Quizzes tool so you have access to the Speedgrader. This provides a much simpler and smoother grading experience.

If you’d like more information on this update, please visit the Canvas release notes.


This post was written by Karin Brown, Instructional Designer with the St. Thomas E-Learning and Research (STELAR) Center at the University of St. Thomas in St. Paul, Minn. To learn more about what STELAR can do for you, please visit our website at  www.stthomas.edu/stelar or email us at stelar@stthomas.edu.