accessibility – Search Results – St. Thomas E-Learning And Research
Search results for

accessibility

Accessibility, Best Practices, Tips, and Tricks

Accessibility: Why is it important, and how do I start?

What would you do if half of the internet were inaccessible to you? Can you even begin to imagine the frustration and exasperation you would feel every time you came across something you couldn’t read, couldn’t hear, couldn’t access?

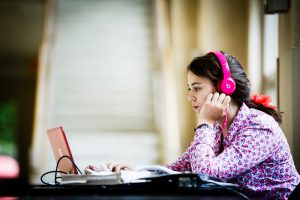
Student Stephanie Garcia studies in Owens Science Hall.

That’s the reality for the 56.7 million Americans who live with disabilities. While awareness around creating accessible web pages and materials is growing, we still have a lot of work to do before the internet (and on a larger scale, our society) can be considered truly inclusive. It makes me wonder… What can I do as an Instructional Designer in the STELAR Center to be more proactive when it comes to accessibility? What can we all do? It turns out there are a variety of things each of us can do to make our materials more accessible, and it takes less time than one might think!

In an effort to be more informed about how I can make more inclusive courses and online materials through my work at the University of St. Thomas, I recently completed an online training on Designing 508 Compliant Programs and Materials.  It was a great opportunity to learn more about the many things we should keep in mind as we design courses and materials to ensure that they will be accessible to everyone. One of my biggest takeaways from this training was the importance of being proactive. It is so much easier to design with accessibility in mind from the beginning than it is to try and retroactively make a course, document, or other material accessible when it wasn’t originally designed to be so.

Now, you may think to yourself, “No one in my target audience has an accommodation need, so I don’t need to worry about it.” I’ll pose a question to you. How certain are you that absolutely no one  in your target audience has an accommodation need? There are many people with disabilities who don’t tell others about it because of the stigma and shame that surrounds disabilities. Also, even if our intended audience doesn’t include someone with an accommodation need right now, there could easily be someone with an accommodation need in the future. It would make everything much easier if we made our materials accessible from the get-go rather than trying to scramble at the last minute.

What’s more, even if someone doesn’t necessarily have an accommodation need, that doesn’t mean some members of your target audience may not prefer to use accessible materials for one reason or another. I’ll give you an example.

Here’s a trailer for the movie Frozen  that came out a few years back. (I know I know, it’s a bit off the beaten path, but I figure some of you may have heard of it!)

Now, here’s the same trailer with audio descriptions.

Personally, I really enjoyed the audio descriptions! I know I definitely chuckled at the line, “The snowman puts himself back together again and glumly contemplates his nose-less state.” I understand that some may find the audio descriptions distracting and may prefer the video without them for one reason or another, but I hope this example showed you that, even among those without  disabilities, we all have different preferences about how we like to consume information.

And that leads me to my other big takeaway from this training: Designing accessible courses and materials doesn’t only benefit those with disabilities. We all  have the potential to benefit from inclusive materials. It makes me think of the doors that use motion sensors to automatically slide open. Those doors were originally designed for people who have trouble opening a traditional door, but we all benefit from the automatic doors. Who doesn’t love walking up to a door and having it automatically open? If we can appreciate inclusivity with something as simple as doors, think of how much more we’ll appreciate inclusivity on the web!

So, what immediate steps can we all take to start creating accessible materials? Luckily, the Center for Faculty Development has curated a wonderful collection of resources where we can learn more about what we can do starting right… now!

Visit the Center for Faculty Development’s Accessibility page to learn about a variety of surprisingly simple ways to make materials more accessible.

This post was written by Karin Brown, an Instructional Designer for the St. Thomas E-Learning and Research (STELAR) Center at the University of St. Thomas in St. Paul, Minn. To learn more about this topic, please visit our website at www.stthomas.edu/stelar or email us at stelar@stthomas.edu.

Best Practices, Tips, and Tricks

PLANNING FOR POST-2020 FLEXIBILITY

A few weeks ago, many people believed that we were emerging from the pandemic. We prepared for a return to the office, the classroom, and in-person gatherings. However, as the guidance and recommendations shift, why should our course planning be any different?

There are a myriad of reasons to plan for classroom flexibility this year:

Below are recommendations to help you build-in and plan for flexibility in your courses, whether they are online, in-person, or blended.

Course Design

Good course design and the principles of Universal Design for Learning require that a course be well-organized so that students can quickly find information and resources to support their learning. If you haven’t already, consider:

  • Including a Getting Started module for student support. Import this pre-made module from Canvas Commons. This module includes a wealth of information and student support resources, such as links to Tommie Tech Services, Zoom Support, and other Academic and Student Support Services. This module also includes a course Q & A forum where students can post questions for you or their peers to answer.
  • Adding more to your course syllabus, such as a checklist for student attendance and communication expectations. For example, if a student cannot attend class in-person, they should email you as soon as possible. When hosting classes on Zoom, you should include your Zoom expectations (cameras on, breakout room participation, etc.)
  • Providing a course cadence statement to your syllabus or the Canvas course, if applicable. For example, “Each module for the following week will be published on Friday. By Wednesday of each week, you should plan to have the reading completed and submit your initial discussion post. On Thursday, come to class prepared to discuss the reading. All Reflection Essay assignments will be due on Fridays at 11:59 pm CST.”
  • Recording your lectures. If possible, having your lectures pre-recorded allows for more flexibility in your classes. It is best practice to record lectures in segments of 10 minutes or less for ease of editing and student engagement. If you suddenly need to pivot online, your material is ready to be deployed to students. Additionally, students can pause or re-watch lectures as needed. You can also add interactive elements to your video lectures (such as quick quiz questions to check understanding) and view analytics. In addition, it’s useful to have your lectures pre-recorded for absent students so they don’t fall behind.
  • Creating accessible activities that serve all learners.

Course Instruction

Plan to build-in flexibility during your live, in-person or Zoom course sessions and be sure to plan for technology to fail at the most inopportune moment. If you haven’t done so yet, consider:

  • Practicing on Zoom. Before the class session, practice on Zoom using your planned technology. Practice sharing your screen, calling up any documents or presentations, initiating breakout rooms, posting in the chat, any transitions, etc.
  • Creating a collaborative document. By creating and sharing a collaborative document before class, you and your students can have a place to post links, catch notes, record questions or comments, and communicate if there is a last-minute change.
  • Planning for intentional social interaction. Establishing a classroom community early can pay dividends later if you need to suddenly pivot to a different modality.
  • Communicating on Canvas by making frequent use of announcements and posting lectures, notes, or resources in the appropriate module.
  • Trying a new tool to facilitate asynchronous time outside of class. There are numerous tools to drive student asynchronous engagement such as video interactives, online posters or white boards (Padlet, Miro, Mural, Google Suite).
  • Technology failures. Technology can and will fail in the classroom. Have an action plan to overcome technology issues. Some actions could be:
    1. Try turning it off and on again
    2. Try a different web browser
    3. Use Canvas to post an announcement or upload an activity or discussion post
    4. Get help – Tommie Tech Services (Services.stthomas.edu) includes Innovation and Technology Services (ITS) team help via phone, drop in, remote, and email support.

Overall, the best laid course plans can go awry and planning for flexibility will offer you and your students more options for learning and lead to a more seamless experience.

This post was written by Kathryn Russell, Instructional Designer with the St. Thomas E-Learning and Research (STELAR) Center at the University of St. Thomas in St. Paul, Minn. To learn more about what STELAR can do for you, please visit STELAR’s website or email us at stelar@stthomas.edu.

Canvas: Did you know...?, Technology Tools

New Rich Content Editor in Canvas

You might not know what it’s called, but you have used the Rich Content Editor multiple times. It’s the ribbon of tools at the top of the frame when you edit pages, discussions, assignments, etc. in Canvas.

St. Thomas is enabling the new Rich Content Editor on January 5th, 2021. However, faculty can switch over to the new editor at any point. Keep in mind that when you switch to the new editor, all users in that class (including students) will be switched over, too. Read more below to learn about the new features and how to try it out.

The original Rich Content Editor featured two rows of editing tools and a sidebar for accessing Links, Files, and Images.

Original Rich Content Editor

The new Rich Content Editor is much more compact and eliminates the right side-bar menu:

New Rich Content Editor

Advantages of the New Rich Content Editor:

  • one hour of auto save (no more losing your work when your browser crashes or you accidentally click Cancel instead of Save)
  • more space on the screen for your work
  • less scrolling when you building quizzes and syllabi

Where did Everything Go?

All the items currently in the menus at the right side of your screen have been split into different icons in the new Rich Content Editor:

  • Course Links (A)
  • Course Images (B)
  • Course Media (C)
  • Course Files (D)

External tools (including Panopto, YouTube, and library materials) are now in the “plug” icon. (E)

The Accessibility Checker (F) and HTML/Text Editor toggle (G) are on the bottom right.

Note: You can also use the menu (H) to do your editing. Click each of the menus to find some additional functionality, such as: undo/redo, inserting a horizontal line as a visual break, additional options for formatting text, and more.

see Canvas tutorials for accessible images of new rich content editor


Can’t find what you’re looking for? Canvas has updated tutorials for faculty and students. Plus, Canvas Support is available 24/7 to help you.

How to Get the New Rich Content Editor

The new Rich Content Editor is available now, but it’s optional. The New Rich Content Editor will be enabled for all users on January 5th, 2021.

Want a sneak peek or to take advantage of the auto-save feature? Enable the New Rich Content Editor in your course(s) by Going into Settings > Feature Options and turning on RCE Enhancements.

This post was written by Nancy McGinley Myers, Instructional Designer with the St. Thomas E-Learning and Research (STELAR) Center at the University of St. Thomas in St. Paul, Minn. To learn more about what STELAR can do for you, please visit STELAR’s website or email us at stelar@stthomas.edu.

Accessibility, Student Systems of Support

Design Resources that are Accessible for All Learners

In this article, I introduce Strategy 3: Design resources that are accessible to all students, not just some students. This is from an Eight Strategies blog series about creating electronic orientation and success resources. New to this series? Also read about Strategy 1 and Strategy 2. 

Strategy 3: Design Resources Accessible for All  

Learn to design resources that are accessible to all learners, not just some learners. I do not know how to fully do all of this (yet), but I am committed to continuing to learn accessibility skills. Whether you are developing a digital orientation, tutoring support, employee training, or another resource in Canvas (or another learning management system), you want everyone to have access to your terrific content, right?  

Accessible for All: Our Values, Mission, and the Law 

Creating fair and equitable access for all is the right thing to do. My values and the St.Thomas Mission Statement guide my accessibility work. Advancing the common good is about the well-being and participation of everybody in our community. People need to have full access to information and learning experiences, including digital/online content, in order to be active members of a learning community.  

If values and mission are not enough to nudge and inspire, recall the many laws (Americans with Disabilities Act-ADA, the Rehabilitation Act Section 504 and 508, Minnesota Human Rights Act) that give “teeth” to these principles. The Section 508 Refresh and What It Means for Higher Education (LaGrow2017) describes Electronic Information and Communication Technology (EICT) as accessible “if it can be used as effectively by people with disabilities as it can by those without.”  As we communicate information electronically (digitally, online), ensure that our learners have equal opportunity and equivalent ease of use.   

Specific Strategies to Use Right Now 

Consider these actions as you strive to create student success sites that work for all learners!

  • Develop a Universal Design for Learning (UDL) Mindset. Universal Design for Learning (UDL) is a set of research-based principles to guide lesson design and teaching. This UDL at a Glance video (4:36) effectively introduces UDL. This CAST website provides additional information on UDL. Consider following the  CAST Twitter to join this movement to expand learning opportunities for all people. 
     
  • Incorporate new accessibility skills into your resource design. ThUniversity of St. Thomas Faculty Development accessibility website page describes approaches to create better access for all. The University of Minnesota Accessible U site promotes six Core Skills for targeting accessibility practices into your site design:  
    • Headings and Document Structure 
    • Hyperlinks 
    • Video Captions 
    • Bullets and Numbered Lists 
    • Color and Contrast 
    • Image Alt Text 

The next revision of the University of MN Accessible U site will add a 7th core skill to the list.   

  • Use the Canvas features for accessibility designOr if you are from an organization that uses another learning management system, ask that company for their accessibility features.  
     
  • Keep on learning! After you learn and incorporate one new accessibility practice, pick another skill to develop. Creating accessible digital resources for all learners requires continual learning and a commitment from all of us. 

Examples in our Success Sites 

Below are some of the practices we currently use in our orientation and student success sites that are co-created with the St. Thomas E-Learning and Research team (STELAR).  

  • Ensure that anything with audio is closed captioned.  
  • In addition to close captioning, also include a transcript document of the audio or video content.  
  • Use bold or italics instead of underline to emphasize a wordunderlining denotes a URL link in an online environment.  
  • Structure documents using paragraph styles or heading tags to make the documents accessible to an individual using a screen reader, and more readable for all students.  
  • When using a colored font for emphasis, use color combined with another visual indicator (bold or italics) to convey information. Someone with color blindness may not perceive the emphasis if you only use color. 

Providing an equitable and effective learning environment for all students requires that we present teaching and learning materials in ways that are accessible for all, including individuals with disabilities. When course materials are designed with this intention, ALL learners benefit. 

This post was written by Jo Montie, Online Learning Systems Facilitator with the St. Thomas E-Learning and Research (STELAR) Center at the University of St. Thomas in St. Paul, Minn. To learn more about this topic, please visit our website at www.stthomas.edu/stelar or email Jo at jkmontie@stthomas.edu. 

Best Practices, Tips, and Tricks, Technology Tools

Basic Video Production Tips and Tricks, Part 2

In a previous post, we looked at five basic video production tools available to faculty and students at St. Thomas.  In this article, I offer some best-practice tips to increase the production value of your recordings. Because videos are often viewed independently online, it’s easy for the viewer to get distracted or multitask while watching. While you don’t have to be a “rock-star” to keep their attention, there are some basic things you can do to make your videos more engaging.

Video Engagement” is a way to track views and retention. The main take-away is that if you want your students to view the entire video, keep it short (5-10 min. or less). If you have more content to cover, consider splitting it into a Part 1, Part 2, etc. Keep your message moving and provide appealing visuals to help carry the content and help students nurture meaning.

Here are ten more tips and tricks for increasing the production value of your audio/video recordings.

  1. Sketch, storyboard, or script your message before recording begins! Even though it’s more work, you’ll find that all your efforts will pay off in the overall quality and impact of your video.
  2. Good video can’t make up for bad audio! Use a good microphone and minimize extraneous noises. If people can’t hear clearly, you won’t get your message across no matter how awesome the video is.
  3. Use well-lit, well-balanced room lighting to light the subject but avoid shadows!  Be careful not to shine a harsh light directly on the subject, nor record in front of windows open to the sunlight.
  4. Control your environment as much as possible! This includes distracting room noise, visual distractions, people and pets. It’s best to be in a quiet, well-lit space.
  5. Frame the shot to capture what’s most important, and then some! Balance your subject in the shot so it’s large enough to be visible, but not too close to be distracting. A little background helps provide context.
  6. Think about what you’re wearing! Avoid wearing pin-stripes or anything distractable. Select clothing that will be in high contrast to the background so you don’t blend in or get lost in the background.
  7. Make sure the text is readable on all slides! Leave plenty of white-space around the text. Choose contrasting colors for text and images. Remember, each screen displays colors differently.
  8. Use headphones and a good microphone during live web-conference situations! This minimizes audio interference and feedback.
  9. All video content need to be close-captioned! This helps all learners. Check out the Close-Caption Request form on the STELAR website.
  10. Check out St. Thomas’ LinkedIn Learning for good examples of videos and tutorials that help with video recording, editing and producing.

Following a few simple tips can make all the difference between students actually watching what you produce, or just skipping through it. After all, if “content delivery” is the primary reason for creating videos, don’t give them a reason for not wanting to watch.

If you’re interested in getting the most out of your pre-recorded videos, but could use a little more guidance, feel free to contact STELAR to request a consultation around your next audiovisual recording project.

This post was written by Michael Wilder, an Instructional Designer for the St. Thomas E-Learning and Research (STELAR) Center at the University of St. Thomas in St. Paul, Minn. To learn more about this topic, please visit our website at www.stthomas.edu/stelar or email us at stelar@stthomas.edu.